2021 Sep 17
Tips on PowerShell Profile
21:51 - By Andrii Dykhlin - PowerShell - Permalink
Extending PowerShell possibilities is a great step beyond the regular usage. For that, we can create the $profile file, which will load every time you start the PowerShell session. You can have a separate profile for each user account, or a generic system one.
To create such file, you can use the following command:
New-Item –Path $Profile –Type File –Force
This will create just an empty text file, and you can open it with notepad or ISE (for example):
notepad $profile
%UserProfile%\Documents\WindowsPowerShell\Microsoft.PowerShell_profile.ps1 - that is the default file.
Once opened, you can modify the file and add whatever you feel right (importing modules, functions, some screen output etc.). PowerShell will execute the commands, and start afterwards, so if you want to check the connectivity to Internet with ping, tracert or whatever, you will have some delay, which might not be great.
You can specify "global" profiles, and of course, the profile could be copied to another machine. The focus of this page is on "local" user profiles.
Just for the reference, here are the names for those variables as described on Microsoft Docs:
| Current user, PowerShell ISE | $PROFILE.CurrentUserCurrentHost, or $PROFILE |
| All users, PowerShell ISE | $PROFILE.AllUsersCurrentHost |
| Current user, All hosts | $PROFILE.CurrentUserAllHosts |
| All users, All hosts | $PROFILE.AllUsersAllHosts |
I will provide some examples you can put in the file below. You can open a new session to reload the profile, but & $profile should work as well.
NOTE: Aliases in PS are not the same as aliases in Bash. You can't replace a whole command with just one word and expect it working, PowerShell aliases is like to replace a longer word with a shorter one (or symbol).
Showing your user info
It is good to see some technical information when you start the session. I have this in my standard user profile:
clear-host
$dc=$env:LOGONSERVER -Replace '\\',''
Write-Host Date:`t`t$(get-date -UFormat "%d.%m.%Y %H:%M")
Write-Host "Logged in as:`t$(whoami)"
Write-Host "Connected to:`t$dc"
Admin profile doesn't have the lines for the logon server (2 and 5) because it is not actually logged on, it's just a PowerShell session started with its rights.
Let's break it down! First line will remove all the extra information which is not necessary, it's the analogue of pressing ^L (Ctrl+L - works starting from PS v5), typing cls in cmd or clear in bash - it clears the screen.
The second line defines the logon server (the domain controller you are connected to), but also removes 2 leading backslashes as they are not relevant and distracting.
Line 3 writes the current date in the format DD.MM.YYYY HH:MM, you can select something else. Reference on Microsoft Docs
Line 4 shows your current username (so you don't confuse the sessions, if anything).
Line 5 writes down the logon server.

Listing the locked out users
As mentioned above, aliases in PowerShell are not like the ones in Bash, so if you want to replace the command with one word, you need to specify a function. If you add it to the profile, you will have that particular function active every time you start the session. Alternatively, you can provide an alias to the function. I used to have the one called "locked" at first, as it fast and easy to type, but good practice is to have the PowerShell naming convention of Verb-Noun.
Just to mention, users get locked out due to the incorrect passwords, so you can check who is currently locked out, so to have Unlock-ADAccount on it (if asked, don't unlock because you think it is right):
function Get-Lockedout {

Search-ADAccount -lockedout | Select-Object Name, SamAccountName

}
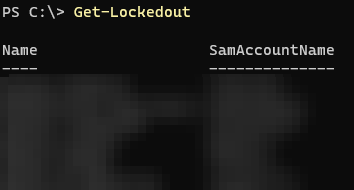
The output will be similar to this:

Checking the *real* expiry date of the accounts
This topic was covered in the previous post!
Listing all enabled users in the group(s) by pattern
This topic is discovered in this post
File Search function
This is documented here.